Billy Wallson
Senior DirectorBilly Wallson is a senior operations director with over 15 years of experience scaling remote teams and implementing lean business strategies.


If your current hosting plan has become too slow, too expensive, or too restrictive for the site you are trying to build, the thought of switching providers can feel like planning a cross-country move in the dark. You have years of content, databases full of customer data, email accounts tied to the server, and a deeply rational fear that one wrong click will erase everything. The reality is that moving a website to a new host is a structured, repeatable process that thousands of site owners execute every month without losing a single file or a single minute of data. When you approach the migration methodically — backing up every component, testing the destination before cutting over, and timing your DNS switch correctly — the worst thing that happens is you wait a few hours for propagation. At Hosting Captain we have walked site owners through this exact transition at every scale, from five-page brochure sites to busy e-commerce stores processing orders around the clock, and we built this guide to give you the complete, step-by-step blueprint for moving your website to a new host without losing data, without extended downtime, and without the panic that comes from not knowing what the next step should be.
Before diving into the tactical steps, it is worth understanding what is at stake when you move website to new host without a plan. A website is not one thing you drag from folder A to folder B. It is a collection of files, a database full of content, configuration settings scattered across control panels, email accounts, DNS records that tell the world where your domain lives, and SSL certificates that encrypt every visitor connection. If you transfer your files but not the database, your site shows up as a blank shell. If you transfer both but forget to update the configuration file with the new database credentials, every page throws a connection error. If you change nameservers before testing the new host, your visitors see an error page until you figure out what is broken. And if you cancel your old hosting plan before confirming that DNS has propagated globally, you create a window where neither your old host nor your new host is serving your site, and that window can cost you sales, leads, and search engine trust.
At Hosting Captain, the migration support requests we field most often are not from people asking how to migrate — they are from people trying to recover from a migration that went wrong because one of those steps was skipped. A site owner who deleted their old hosting account the moment they signed up for a new one, not realizing DNS takes up to 48 hours. Another who copied files via FTP but never exported the MySQL database, leaving behind three years of blog posts and customer reviews. These are entirely preventable outcomes once you understand that a migration is a sequence of discrete, verifiable steps and that rushing or rearranging those steps is the only real risk. The process outlined in this guide follows the same sequence that professional migration teams use, and if you follow it without skipping ahead, you will land on your new host with every byte of data intact. For foundational context on what a hosting environment actually provides, our web hosting basics guide explains the server infrastructure you are moving between in plain language.
The first phase of any successful migration is not about moving data — it is about understanding exactly what data exists and where it lives. Log into your current hosting control panel and take inventory. How many websites or addon domains are attached to this account? Which ones use a database, and which are static HTML? Are there email accounts you actively use that are tied to the server? Are there cron jobs, custom PHP configurations, or SSL certificates you will need to recreate? Write all of this down. The front-end of your site is the part you see every day, but the back-end infrastructure — the database names, the FTP usernames, the DNS zone records, the email forwarders — is what determines whether the migration succeeds, and that infrastructure is invisible until you go looking for it.
At this stage you should also record your site's disk space usage, inode count, database size, and PHP version. Your new host will have its own limits, and there is no point migrating to a plan that cannot hold your existing data. If your current site uses 3 GB of disk space and the new plan offers 2 GB, you either need a larger plan or you need to clean house before migrating. Check your current PHP version as well, because if your site runs on PHP 7.4 and your new host defaults to PHP 8.2, certain plugins or custom code may break and need attention before the move. For a broader understanding of the terms you will encounter during this inventory process, refer to our complete hosting glossary, which defines every hosting term you are likely to encounter in your control panel.
Your new hosting account should be fully provisioned, functional, and ready to receive content before you export a single file from your old host. Sign up for the new plan, complete any account verification steps, and log into the new control panel to confirm that you can access the file manager, database tools, and DNS settings. If your new host offers a one-click installer for your CMS — WordPress, Joomla, Drupal — do a test installation to verify that the environment works, then delete it so you have a clean slate for your actual migration. Take note of the new hosting account's assigned nameservers and IP address; you will need both later. Also confirm that your new plan's disk space, bandwidth, and database limits comfortably exceed what your current site uses, because migrating to a plan you will outgrow in six months just means doing this all over again.
One frequently overlooked step at this stage is ensuring that your new host runs a compatible software stack. If your site requires a specific PHP version, a particular MySQL or MariaDB version, or certain PHP extensions like ImageMagick, ionCube, or Redis, verify that the new host supports them. Most quality hosting providers publish their server specifications or will confirm compatibility if you ask. At Hosting Captain, our support team routinely helps migrating customers verify stack compatibility before they begin transferring data, because discovering a PHP incompatibility after DNS has already been switched is a completely avoidable headache. If you are moving to a shared hosting plan, pay particular attention to resource limits like inode counts and CPU seconds, which may be more restrictive than what you are accustomed to on your old plan.
Backing up is the step where a migration either succeeds cleanly or fails catastrophically, and it is the step you should spend the most time verifying. A complete backup has two main components: your website files and your database. If you use cPanel, the Backup Wizard automates this by producing a compressed archive of your entire home directory and a separate .sql.gz file for each database. Download both and store them on your local computer. If you do not use cPanel, you can back up files manually by connecting via FTP with a client like FileZilla, navigating to your public_html or www directory, and downloading every file and folder. Enable "show hidden files" in your FTP client so that critical configuration files like .htaccess, .user.ini, and wp-config.php are included. A backup that is missing your .htaccess file will break every URL rewrite and redirect on your restored site, and that file is hidden by default on most servers.
For the database, log into phpMyAdmin from your old host's control panel, select your database from the left sidebar, click the Export tab, choose the "Quick" method with SQL format, and click Go. The resulting .sql file contains every post, page, product, comment, user account, and setting your site depends on. If your site uses multiple databases — a common setup when running a WordPress site alongside a separate forum or e-commerce backend — export every one individually and label them clearly. For sites with large databases exceeding 100 MB, the phpMyAdmin export may time out. In that case, use the mysqldump command over SSH if your plan includes shell access, or ask your current host's support team to generate a database dump on your behalf. Do not skip the database backup and hope for the best; files without a database is like a library with empty shelves. If you need a refresher on what each hosting component does before you begin moving them, our hosting glossary defines databases, FTP, and every other term relevant to the backup process.
With your backup files safely downloaded, the next step is uploading them to your new hosting account. Connect to your new host via FTP using the credentials provided in your welcome email, navigate to the document root directory — typically public_html, www, or the domain-specific directory your host provides — and upload all files while preserving the original folder structure. FileZilla and similar FTP clients let you drag and drop entire directories, and the transfer will maintain subfolder organization automatically. This process can take anywhere from a few minutes for a small brochure site to several hours for a media-heavy site with thousands of images and videos. Do not interrupt the transfer halfway through; incomplete uploads create partial sites that are harder to troubleshoot than a clean, single-session transfer. If your connection is unreliable, use an FTP client that supports transfer resumption so a dropped connection does not force you to restart from zero.
After the upload completes, spot-check several key files to confirm they arrived intact. Download a few images from the new server and open them locally to verify they are not corrupted. Check that your .htaccess file transferred correctly — some servers strip hidden files during FTP transfers, and you may need to re-enable hidden file viewing or re-upload the file manually. If you are migrating a WordPress site, confirm that the wp-content directory contains all expected subdirectories including themes, plugins, and uploads. A missing uploads folder means every image on your site will be broken, and catching that now saves you from discovering it after you have announced the migration as complete. For context on how file organization and server configuration affect your site's performance after migration, see our guide on how hosting affects website speed, which explains the server-side factors that determine how fast your migrated site loads.
The database is the brain of your website, containing every piece of dynamic content your site has ever published, and importing it correctly is the single most consequential step in the entire migration. Log into your new host's control panel, open phpMyAdmin or the database management tool provided, and create a new empty database along with a database user who has full privileges on that database. Give the database a name and make note of three pieces of information: the database name, the database username, and the database user's password. These credentials will go into your site's configuration file in the next step. Once the database is created, select it in phpMyAdmin, click the Import tab, choose the .sql file you exported from your old host, and click Go. phpMyAdmin will read every SQL statement in the file and recreate your tables, rows, indexes, and stored data inside the new database.
Large database imports face the same timeout risk as large exports. If your .sql file exceeds 50 MB, phpMyAdmin may time out before the import completes. In that case, compress the file to a .zip or .gz archive and upload the compressed version — phpMyAdmin can decompress and import in a single step, and compressed uploads are faster. If the database is still too large, use the mysql command-line tool over SSH if your plan allows it, or contact your new host's support team and ask them to import the database from your provided .sql file. Most managed hosting support teams handle this daily and can import databases of any size without timeout issues. After the import finishes, browse through the tables to confirm that the expected number of entries are present — if your WordPress site had 200 blog posts, the wp_posts table should contain at least that many rows. An incomplete import that only transferred half your tables is recoverable if you catch it now and re-import, but it is a nightmare to discover after launch.
Your site's files are now on the new server and your database is imported, but the two are not yet connected. The configuration file that tells your CMS which database to use still holds the old host's credentials — database name, username, password, and host address. You must update this file to match the new database you created on the new host. For a WordPress site, this is the wp-config.php file in your site's root directory. Open it in your FTP client's text editor or via the new host's file manager, and locate the lines that define DB_NAME, DB_USER, DB_PASSWORD, and DB_HOST. Replace the old values with the new database name, username, and password you created in Step 5. The DB_HOST value is almost always localhost on shared and managed hosting, but some providers use a remote database server — check your new host's documentation or welcome email for the correct value. For other CMS platforms like Joomla, Drupal, or Magento, the configuration file will have a different name and location but the same principle applies: find the database connection settings and update them to reflect your new environment.
After saving the configuration changes, your site should be technically functional on the new host, even if it is not yet publicly accessible. But there is one more configuration file worth checking: .htaccess. If your site uses custom rewrite rules, redirects, or security headers defined in the .htaccess file, open it and verify that none of the rules reference the old server's file paths or domain name. .htaccess rules that contain hardcoded old-domain references will produce redirect loops or 500 errors on the new server. If you are unsure whether a rule is safe, comment it out temporarily with a # at the start of the line — you can always re-enable it after you have confirmed the site works. A clean configuration file update at this stage prevents the most common post-migration error we see at Hosting Captain: a site that has been fully transferred but shows a "database connection error" because nobody updated the credentials, followed by the site owner assuming the migration failed and starting over from scratch.
Testing your site on the new host before you change a single DNS setting is the step that separates a zero-stress migration from a panic-inducing one. Most hosting providers give you a temporary URL — often in the format server.hostingcompany.com/~username/ or via a preview link in the control panel — that lets you browse your site on the new server before your domain points there. If your new host does not provide a temporary URL, you can test by modifying your local computer's hosts file, which overrides DNS for your machine only. On Windows, edit C:\Windows\System32\drivers\etc\hosts with Notepad run as Administrator. On macOS and Linux, edit /etc/hosts with sudo. Add a line like 203.0.113.42 yourdomain.com www.yourdomain.com, replacing the IP with your new server's IP address and the domains with your actual domain. Save the file, flush your DNS cache, and open your domain in a browser — your computer will connect to the new server while the rest of the world still sees the old one. This lets you test the migrated site in exactly the environment it will serve from after launch.
What should you test? Click through every page type your site has — the homepage, blog posts, product pages, contact form, search results, category archives. Verify that images load at full resolution. Submit your contact form to confirm that email delivery works on the new server. Log into your CMS admin panel and confirm that all plugins are active, that the media library shows your uploaded files, and that you can create a new test post. If your site uses SSL, check that you can access the temporary preview URL or hosts-file test over HTTPS; you may see a certificate warning for the temporary URL, which is normal and will resolve once your domain points to the new host and the SSL certificate is properly issued. Test on both desktop and mobile browsers. Every issue you find and fix now is an issue your visitors never see. For insight into what performance improvements to look for during testing, our guide on how hosting affects website speed explains which metrics to measure and what numbers constitute a genuine upgrade.
Once you have tested every page, every form, and every function on the new host and confirmed everything works, it is time to tell the world where your site now lives. DNS is the internet's address book, and updating it is what makes visitors typing your domain name reach your new server instead of your old one. As Mozilla's domain name guide explains, domain names exist purely to give humans a memorable address for a server's numeric IP — and changing where that name points is the act of migration itself. There are two ways to make this change, and which one you use depends on where your DNS is managed.
If you manage DNS at your domain registrar, you will use the A record method. Log into your registrar's DNS management panel, locate the A record for your root domain (the @ host), and update its value to the IP address of your new hosting server. Do the same for the www A record. If your registrar uses a CNAME for www that points to the root domain, updating just the root A record is sufficient because the CNAME follows automatically. If you manage DNS through your hosting provider using the nameserver method, log into your domain registrar and replace the old host's nameservers with the new host's nameservers, which you will find in your new hosting welcome email. Both methods achieve the same result, but the nameserver method delegates all DNS management to your new host, which is simpler for most site owners. Either way, after you save the change, DNS propagation begins — a process that takes anywhere from a few hours to 48 hours as the updated records cascade through DNS resolvers worldwide. During propagation, some visitors will reach your old site while others reach the new one, which is completely normal. Do not cancel your old hosting plan yet.
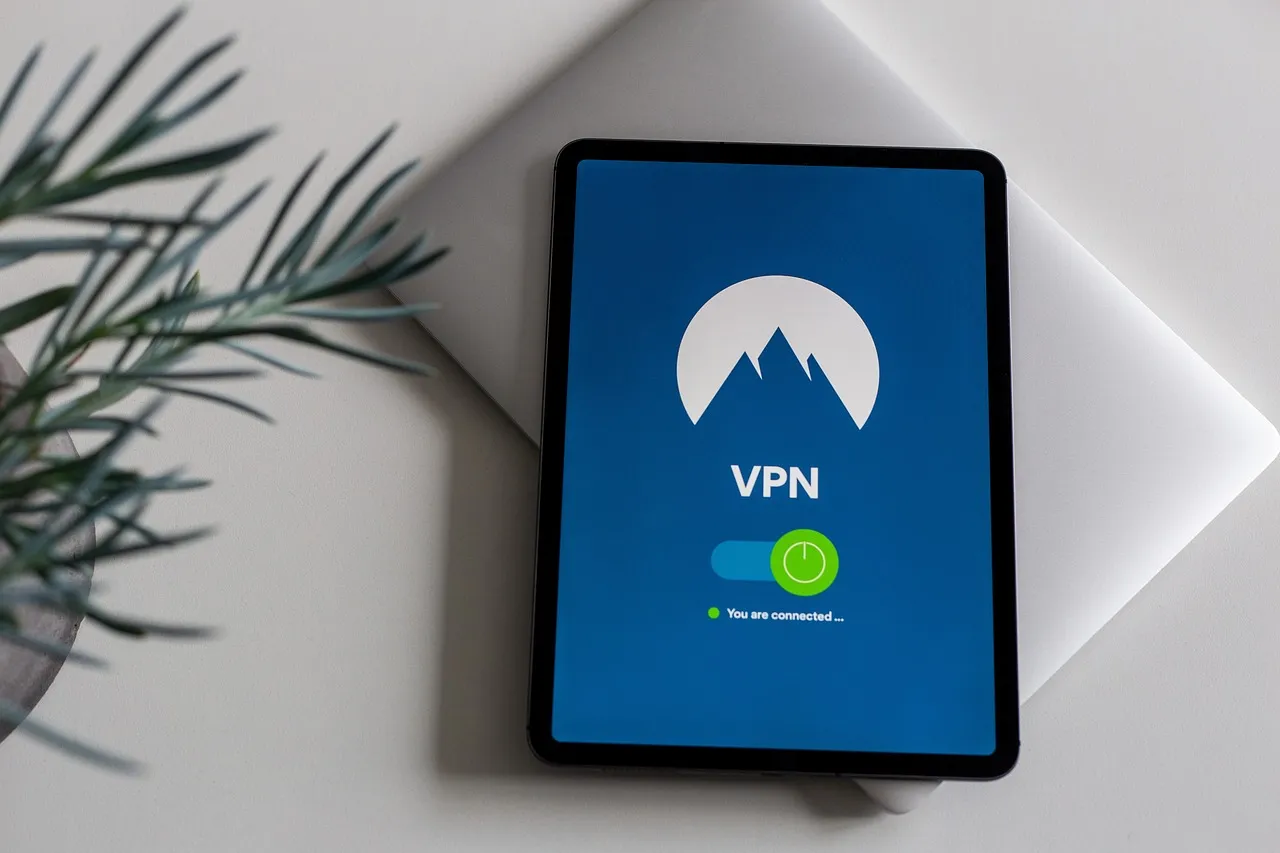
The standard migration process described above involves a brief window where the old and new sites coexist and visitors may land on either one, but what if your site genuinely cannot afford any downtime — an e-commerce store processing orders every hour, a membership platform with users logged in around the clock, or a SaaS application with an uptime guarantee you need to honor? A zero-downtime migration uses the same foundation as the standard process but adds one critical tactic: lower your DNS TTL values at least 24 hours before the migration. TTL, or Time to Live, is the number of seconds that DNS resolvers are told to cache your records before checking for updates. A typical default TTL is 3600 seconds (one hour) or higher. By lowering it to 300 seconds (five minutes) a day in advance, you ensure that when you do switch the A record or nameservers, the propagation window shrinks from potentially 48 hours to a matter of minutes for most visitors.
For sites that require surgical precision, a second technique is to keep both the old and new hosts serving the site simultaneously during the DNS transition and sync the database between them so that no data is lost from either side. This requires your site to be capable of running on two different servers at once without conflicts. For read-heavy sites like blogs and brochure sites, this is straightforward because visitors are only consuming content, not modifying it. For sites where users create data — shopping carts, form submissions, forum posts — you need to designate one server as the canonical data source until DNS has fully propagated, then perform a final database sync in the direction of the new server before decommissioning the old one. Most small-to-medium sites do not need a full zero-downtime approach because a few hours of intermittent availability during DNS propagation causes no measurable business impact. But if yours does, the TTL trick alone eliminates the worst-case propagation delay, and it costs nothing to implement. At Hosting Captain, we advise every migrating customer to check their TTL settings before a migration, even if they are not aiming for zero downtime, because lower TTLs make DNS changes faster and reduce the anxiety of the propagation waiting period.
Over years of guiding migrations, the Hosting Captain support team has catalogued a short list of mistakes that recur across every platform, every CMS, and every skill level of site owner. The first and most damaging is canceling the old hosting plan too early. The moment you cancel, your old host may terminate your account immediately or within hours, and if DNS has not fully propagated or the new site has an undiscovered issue, you have nowhere to roll back to. Keep your old hosting plan active for at least seven days after your DNS switch, and verify that Search Console shows your new URLs being indexed before you cancel. A seven-day overlap costs at most one month of an extra hosting bill and buys you a complete insurance policy against migration failure.
The second major mistake is hardcoding the domain name in the database before testing. Many CMS platforms store the site URL in the database — WordPress keeps it in the wp_options table under siteurl and home. If you imported your old database without updating these values to your temporary testing URL or the new server's preview address, every link on your test site points back to your old domain, and logging into the admin panel redirects you to the live site on the old host. Before testing, either update these values in the database via phpMyAdmin or add temporary override constants to your configuration file so your test environment resolves correctly. The third mistake is migrating email without a plan. If your email accounts are tied to your old hosting server, changing nameservers will cause incoming mail to route to the new server, where those email accounts do not exist unless you recreated them. Either recreate every email account on the new host before switching nameservers, or migrate your email to a dedicated provider like Google Workspace or Microsoft 365 before the move so that email is independent of both hosting accounts.
The fourth mistake is assuming SSL certificates will work automatically. If your old host provisioned your SSL certificate, that certificate is tied to the old server and will not function on the new one. Your new host must issue a fresh SSL certificate for your domain — most modern hosts provide free AutoSSL or Let's Encrypt certificates that activate within minutes of your domain pointing to the server. However, during the DNS propagation window, visitors may hit the new server before the SSL certificate has been issued, triggering browser security warnings. To mitigate this, pre-install an SSL certificate on your new host using your hosting control panel's SSL tool before switching DNS. If your host supports it, use a temporary self-signed certificate for testing, then switch to a trusted certificate once the domain resolves. Finally, do not assume your old host's PHP settings carry over. If your site requires specific PHP memory limits, execution times, upload sizes, or extension settings, configure those in your new hosting control panel before launch. A site that worked perfectly on your old host can throw fatal errors on the new one simply because the default PHP memory limit is 64 MB instead of 256 MB.
The migration is not complete when your DNS changes propagate. The first 72 hours after a DNS switch are the highest-risk period for discovering issues that testing missed, and a structured post-migration checklist ensures nothing slips through. Start by verifying that your SSL certificate is active on the live domain — visit your site over HTTPS on multiple browsers and devices, check for the padlock icon, and confirm there are no mixed content warnings. Mixed content occurs when your site loads over HTTPS but some assets — images, scripts, stylesheets — still reference HTTP URLs from the old server or database. Plugins like Really Simple SSL for WordPress can detect and fix most mixed content issues automatically.
Next, submit your new XML sitemap in Google Search Console and use the URL Inspection tool to request indexing of your homepage and top pages. Check the Search Console coverage report over the following days for any unexpected 404 errors, which indicate pages that did not transfer or redirects that were missed. Set up the Redirection plugin if you are on WordPress and enable 404 logging so you catch orphaned URLs quickly. Test every form on your site — contact forms, newsletter signups, checkout flows — to confirm that email delivery works from the new server. Email deliverability often changes during a host migration because the sending IP address changes, and you may need to configure SMTP authentication or update SPF and DKIM records if you use a third-party email service. Finally, run a full speed test using PageSpeed Insights or GTmetrix and compare the results against your pre-migration benchmarks. Hosting speed is one of the primary reasons people switch hosts, and if your new site is not demonstrably faster, there is a configuration issue — caching not enabled, PHP version not optimized, or assets not being served efficiently — that deserves immediate attention before it impacts your rankings.
The timeline for canceling your old hosting plan should be conservative. Wait at least seven full days after your DNS switch, and longer if your site is large or your traffic is high. During this window, verify three things: that your new site's search engine indexing is proceeding normally in Search Console, that all email accounts are functioning on the new host or your third-party email provider, and that you have not identified any missing content or broken functionality that would require you to access the old server. If you discover a problem that requires files or database tables that exist only on the old host, having that account still active is the difference between a quick fix and a permanent data loss. Once you are confident the migration is stable, back up your old hosting account one final time — download a complete cPanel backup or manual FTP and database dump — and store it for at least 30 days before canceling. After cancellation, many hosts do not retain backups, and recovering data from a terminated account is either impossible or prohibitively expensive.
At Hosting Captain we have seen too many site owners cancel their old plan on the same day as the DNS switch, only to realize 24 hours later that their email stopped working or that a database table failed to import. A month of overlapping hosting costs is a negligible insurance premium against losing years of content, and it is the only part of a migration where impatience has actual financial consequences. Set a calendar reminder for 14 days after your DNS switch, verify everything one more time, and only then submit the cancellation request. If your old host offers a money-back guarantee or prorated refund, the overlap period may cost nothing at all — check your old host's refund policy before assuming you will pay for the extra weeks. For a broader overview of what you should look for in a host so you are not migrating again next year, our shared hosting guide covers the features and support structures that make a hosting relationship last.
A correctly executed migration should not cause a permanent drop in search rankings. Google treats a host change as a server-side event, not a content change, and as long as your site remains accessible, your content stays the same, and your page speed does not degrade, rankings typically stabilize within a week or two. The biggest ranking risk during a host migration is downtime — if Google crawls your site while DNS is propagating and the new server returns errors, it may temporarily demote affected pages. Minimize this window by lowering your DNS TTL before the switch and by keeping your old host active during propagation so that even if a visitor or crawler hits the old server, it serves a valid response. The second risk is a significant performance regression — if your new host is slower than your old one, Core Web Vitals will decline and rankings may follow. Always run pre- and post-migration speed tests to confirm the new host is an upgrade, not a downgrade.
The active work of migrating a site — downloading backups, uploading files, importing the database, and updating configuration — typically takes between one and four hours for a site up to a few gigabytes in size. Larger sites with extensive media libraries or databases exceeding 500 MB can take proportionally longer, especially if you need to work around FTP transfer timeouts or phpMyAdmin import limits. The passive waiting period is DNS propagation, which can range from 30 minutes to 48 hours depending on your TTL configuration, your domain's TLD registry, and how aggressively individual ISPs cache DNS records. If you lower your TTL to 300 seconds at least 24 hours before the switch, the effective propagation window for most visitors shrinks to under 30 minutes. The full process from signing up for a new host to canceling the old one should span about 10 to 14 days to allow adequate testing and a comfortable post-migration verification window.
For a standard WordPress site, a static HTML site, or any CMS with a built-in export tool, a DIY migration is entirely achievable if you follow the steps in this guide methodically. The technical skills required are basic — using FTP, navigating a hosting control panel, and editing a text file — and the process itself is more about patience and verification than technical expertise. For complex sites — large WooCommerce stores with ongoing orders, multisite WordPress networks, custom-coded applications, or sites with complex email setups — hiring a migration professional is worth the $150 to $500 it typically costs. The scenarios where professional help pays for itself are those where downtime has a direct dollar cost, where you cannot afford the learning curve, or where the site's architecture involves components you do not fully understand. At Hosting Captain, our support team includes migration specialists who can handle the entire process or guide you through it step by step, depending on your comfort level.
No. Your domain registration is completely independent of your hosting account. You can keep your domain registered at your current registrar — Namecheap, GoDaddy, Google Domains, Cloudflare, or wherever you purchased it — and simply update either the nameservers or the A record to point the domain to your new hosting server. The domain itself does not move; only where it points changes. This separation is one of the best design features of the web infrastructure because it means you can switch hosting providers as many times as you want without ever touching your domain registration, and you can switch domain registrars without affecting your hosting. If you purchased your domain through your old hosting company and want to consolidate everything, you can initiate a domain transfer to a third-party registrar, but that is a separate process from the website migration and is entirely optional. As the Mozilla Developer Network explains, a domain name is an address, not a physical location, and changing where it points is all you need to do to complete a hosting migration.
Email handling during a migration depends entirely on whether your email accounts are hosted on your old server or managed by a third-party service. If your email accounts — [email protected] addresses — are hosted on your old server, changing nameservers will cause incoming email to route to the new server. For those emails to be received, you must recreate every email account, mailbox, and forwarder on the new host before switching nameservers, and you should back up existing emails from the old server via IMAP download or your control panel's email backup tool before the move. If you use Google Workspace, Microsoft 365, Zoho Mail, or any other third-party email provider, your email is managed through MX records that are independent of your web hosting. As long as your MX records remain unchanged during the DNS update, your email will continue functioning without interruption regardless of where your website is hosted. This is one of the strongest arguments for separating email hosting from web hosting — it makes future migrations far simpler.
You should not point your live domain to the new host for testing — that is what the temporary URL, preview link, or hosts file method is for. If you change your domain's DNS to point to the new host before testing, you lose the ability to compare the old site against the new one, and any visitor who arrives during that window sees whatever state your test site is in, which may be incomplete or broken. Use your new host's temporary preview URL if they provide one, or edit your local hosts file to override DNS for your machine only. This lets you browse your exact domain on the new server while the rest of the world still sees the old live site, giving you unlimited testing time with zero public visibility. Only switch the live DNS after every test passes and you are satisfied that the migrated site is complete and functional. For a deeper understanding of how domain names interact with hosting servers, our web hosting basics guide covers the domain-hosting relationship in detail.
Software stack incompatibility is one of the most common reasons a migration stalls. If your site requires PHP 7.4 and your new host only offers PHP 8.0 and above, you have two options: update your site's code to be compatible with the newer PHP version before migrating, or find a host that supports the version you need. Most sites that run on actively maintained CMS platforms like WordPress will work on newer PHP versions, but older plugins and themes may not. Test your site on a PHP version that matches your new host's environment before the migration by changing the PHP version on your old host if that option is available, or by setting up a local test environment with the target PHP version. If you cannot resolve the incompatibility, contact your new host's support team — some hosts allow per-account PHP version selection and can match your old environment exactly. At Hosting Captain, we support multiple PHP versions across all plans and can help you select the version that matches your site's requirements before you begin the transfer.

Billy Wallson is a senior operations director with over 15 years of experience scaling remote teams and implementing lean business strategies.

Hosting Captain has been exceptional for my e-commerce store in Pune. The NVMe SSD speed is noticeable, and their support team responds within minutes. Highly recommended for any Indian business!
Switched from a US-based host to Hosting Captain and my website loads 3x faster for Indian visitors. The free SSL and cPanel are great, and the pricing is unbeatable. Very satisfied customer!
I've been using their VPS plan for 2 years now. 99.9% uptime is not just a claim — it's reality. My client projects run without interruption. The KVM virtualization gives me full control I need.
The support team helped me migrate my entire WordPress site at 2 AM without any downtime. This level of service is rare in Indian hosting. Worth every rupee!
As a startup, budget matters. Hosting Captain's Business plan covers everything we need — multiple websites, free SSL, daily backups — at a fraction of what international hosts charge.
Our high-traffic news portal needed a dedicated server. Hosting Captain's DS Business plan handles 100K+ daily visitors effortlessly. Their team provisioned everything within 4 hours!


From personal blogs to enterprise solutions, we've got you covered!
© 2026 Hosting Captain. All Rights Reserved by 'Apollo Hosting'.