What a DigitalOcean Droplet Actually Is — Beyond the Marketing Language
The Virtual Machine That Changed How Developers Think About Hosting
DigitalOcean's core product is the Droplet — a virtual private server instance that you can create, configure, and destroy through a web interface or API in roughly sixty seconds. At its technical foundation, a Droplet is a KVM-based virtual machine running on DigitalOcean's hypervisor infrastructure, allocated a dedicated number of vCPUs, a dedicated amount of RAM, a dedicated allocation of SSD-based storage, and a dedicated data transfer quota — all of which are guaranteed resources, not shared or burstable allocations that vary based on what neighboring virtual machines are doing on the same physical host. This guarantee of dedicated resources is the fundamental distinction between a vps digital ocean Droplet and a shared hosting account, where CPU, RAM, and I/O are divided across an unknown number of other websites on the same server. When DigitalOcean tells you a Droplet has 2 GB of RAM, that RAM is available to your operating system and applications at all times, in all conditions, without contention from other customers. The Wikipedia entry on virtual private servers provides the broader technical context for how hypervisors partition physical hardware into isolated virtual machines, and DigitalOcean's Droplet platform sits squarely within this well-established virtualization paradigm, differentiated primarily by its developer experience — the speed of provisioning, the cleanliness of the API, and the depth of the documentation ecosystem — rather than by any novel virtualization technology.
In my twelve years of evaluating and deploying hosting infrastructure for clients ranging from solo developers to funded startups, I have observed that DigitalOcean occupies a specific position in the hosting market that is frequently misunderstood by first-time VPS users. DigitalOcean Droplets are unmanaged VPS instances: the company is responsible for the physical hardware, the hypervisor layer, the network connectivity, and the control panel and API through which you interact with your Droplets, but everything inside the virtual machine — operating system configuration, software installation, security hardening, performance optimization, application deployment, backup management — is your responsibility as the Droplet owner. This unmanaged model is simultaneously DigitalOcean's greatest strength and its greatest barrier to entry. It gives experienced developers complete control over their server environment at a price point ($4 to $6 per month for the entry-level Droplet, depending on configuration) that is competitive with shared hosting; it gives beginners a blank Linux server with root access and no guidance on how to make it serve a website. The sections that follow explain exactly what you need to know to bridge that gap, starting from the moment you create your first Droplet and progressing through every decision that determines whether your VPS experience is empowering or frustrating. For foundational context on what VPS hosting is and how it fits into the broader hosting ecosystem, our complete VPS guide explains the architecture and use cases of virtual private servers in detail, and this guide builds on that foundation with DigitalOcean-specific implementation.
Droplet Types, Sizing, and the Configuration That Actually Matters for Your Use Case
Basic, General Purpose, CPU-Optimized, and Memory-Optimized Droplets
DigitalOcean organizes Droplets into four categories based on the ratio of CPU to RAM and the underlying hardware characteristics, and understanding which category matches your workload is the most important decision you make during Droplet creation because it determines both performance and cost for the lifetime of the instance. Basic Droplets are the entry-level option, available in two sub-types: regular Basic Droplets with Intel CPUs and shared vCPUs, and Premium Basic Droplets with newer-generation Intel or AMD CPUs, NVMe storage (instead of standard SSDs), and dedicated vCPUs rather than shared. The regular Basic Droplet is appropriate for development environments, personal projects, and low-traffic websites where the possibility of CPU steal time — cycles where your vCPU is waiting because the physical core is servicing another customer's virtual machine — is acceptable. The Premium Basic Droplet eliminates CPU steal time through dedicated vCPU allocation and adds NVMe storage for lower database query latency, making it appropriate for production websites and applications where performance consistency matters. The price difference between Basic and Premium is typically twenty to thirty percent, and in our experience at Hosting Captain, that premium pays for itself in consistent page load times and elimination of the intermittent slowdowns that shared vCPU instances occasionally experience during periods of high physical host utilization.
General Purpose Droplets are the mid-tier option, providing a balanced ratio of vCPUs to RAM (one vCPU per 4 GB of RAM at the smaller sizes) on dedicated vCPUs with NVMe storage. These Droplets are designed for production web applications, databases, and application servers where workloads are varied — a mix of CPU-bound request processing, memory-bound caching, and I/O-bound database queries — and no single resource dimension dominates. CPU-Optimized Droplets provide the highest per-vCPU performance and the highest vCPU-to-RAM ratio (one vCPU per 2 GB of RAM), targeting compute-intensive workloads: video transcoding, machine learning inference, batch data processing, and high-traffic web applications that do significant server-side rendering. Memory-Optimized Droplets provide the inverse ratio (one vCPU per 8 GB of RAM), targeting memory-intensive workloads: in-memory databases (Redis, Memcached), large MySQL or PostgreSQL instances with high buffer pool allocations, and applications that cache substantial amounts of data in application-level memory structures. For a first-time VPS user hosting a standard WordPress site, a web application, or a Node.js API, the Premium Basic Droplet (or the regular Basic for non-production use) is the correct starting point; the specialized instance types address workloads that a beginner is unlikely to encounter until they have specific performance data showing that their application is CPU-bound or memory-bound at the Basic tier.
Droplet Sizing: What the Specifications Actually Support
DigitalOcean's Droplet sizing follows a linear scaling pattern where doubling the price approximately doubles each resource dimension, and understanding what each size tier can practically support helps you avoid both under-provisioning (paying for a Droplet that cannot handle your traffic) and over-provisioning (paying for capacity you do not need). The entry-level Premium Basic Droplet at $6 per month ($4 for regular Basic) provides 1 vCPU, 1 GB of RAM, 25 GB of NVMe SSD storage, and 1,000 GB of data transfer. This configuration can comfortably run a single low-to-moderate-traffic WordPress site with proper caching (Nginx FastCGI cache or a caching plugin), handling 5,000 to 15,000 monthly visitors depending on page complexity and cache hit rate. The 2 GB RAM Droplet at $12 per month Premium ($8 regular) is the sweet spot for first-time VPS users running a single production website: 2 GB of RAM provides enough headroom for MySQL buffer pool allocations, PHP-FPM worker pools, and operating system overhead without swapping, comfortably supporting 20,000 to 50,000 monthly visitors with caching. For multiple websites on a single Droplet, add approximately 512 MB of RAM per additional modest-traffic site after the first, meaning a 4 GB Droplet can handle three to five small-to-medium sites, and an 8 GB Droplet can handle eight to twelve.
The storage and data transfer specifications are rarely the binding constraint for standard web hosting workloads. WordPress sites, even image-heavy ones with thousands of media uploads, typically consume 5 GB to 15 GB of storage including the operating system, web server, database, and all content. The 25 GB minimum on Basic Droplets is sufficient for the vast majority of single-site use cases, and upgrading to a larger Droplet for additional storage is generally unnecessary because block storage volumes — attachable SSD storage that can be added to any Droplet independently of the Droplet size — provide additional capacity at $0.10 per GB per month. Data transfer overages are billed at $0.01 per GB beyond the monthly allocation, and for most small-to-medium websites, the included transfer allocation is significantly more than monthly traffic consumption. The operational constraint that typically triggers a Droplet upgrade is RAM, not CPU, storage, or transfer, because Linux's memory management degrades gracefully under CPU pressure but catastrophically under memory pressure — when a Droplet exhausts physical RAM, the kernel begins swapping to disk, and performance collapses from sub-second page loads to multi-second timeouts.
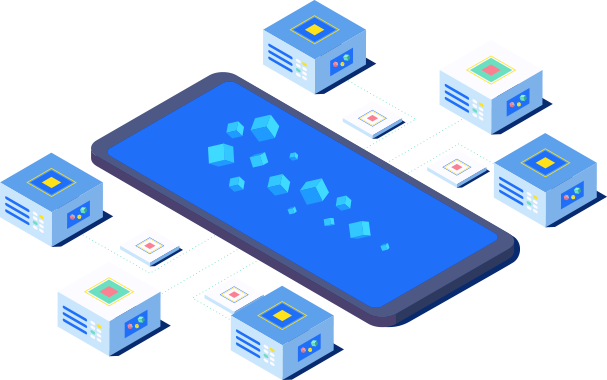
Illustration: DigitalOcean VPS Droplets Explained for First-Time UsersCreating Your First Droplet: The Setup Decisions That Matter Long-Term
Operating System and Image Selection
DigitalOcean offers one-click application images (LAMP stack, LEMP stack, WordPress, Node.js, Docker) and clean operating system images (Ubuntu, Debian, CentOS, Fedora, Rocky Linux), and the choice between them determines your initial setup velocity and your long-term upgrade flexibility. One-click images deploy a fully configured application stack — operating system, web server, database, PHP or runtime environment — in a pre-integrated bundle that eliminates the manual installation and configuration steps that consume an hour or more during manual setup. The trade-off is that one-click images are harder to keep updated over time because the component versions are fixed at image creation time, and upgrading individual components — moving from PHP 8.1 to PHP 8.3, replacing MySQL 8.0 with MariaDB 10.11, adding Redis for object caching — requires manual intervention that may conflict with the image's pre-configured settings.
For first-time VPS users who want a fast path to a working website and are willing to accept the maintenance trade-off, the OpenLiteSpeed WordPress image provides a high-performance LAMP-like stack with the LiteSpeed web server, which delivers cached page performance comparable to much more expensive hosting configurations. For users who want maximum control and are comfortable with command-line configuration, an Ubuntu LTS (Long Term Support) image — Ubuntu 24.04 LTS as of 2026 — provides the broadest software compatibility, the largest community for troubleshooting, and the longest support window (five years of security updates from Canonical). Hosting Captain recommends the Ubuntu LTS path for anyone planning to maintain their Droplet for more than a year, because the manual installation investment pays for itself in upgrade flexibility and the elimination of dependency on a pre-configured image whose update cadence may diverge from the component versions your applications require. After selecting the operating system image, the remaining creation options are: data center region (choose the region geographically closest to your primary audience — latency increases by roughly one millisecond per one hundred kilometers of distance), authentication method (SSH keys are more secure than password authentication; DigitalOcean strongly encourages SSH key use and provides an interface for adding your public key during Droplet creation), and hostname (choose something descriptive — "web-server-nyc1" or "client-site-production" — rather than leaving the default, because finding the right Droplet in a list of similarly named instances is frustrating at scale).
The Post-Creation Hardening You Must Perform Before Deploying Anything
DigitalOcean creates your Droplet with a publicly accessible IP address and a root user account accessible via the authentication method you selected, but the Droplet in its freshly created state is not production-ready — it is a blank Linux installation with default configuration that leaves attack surfaces open that you must close before deploying any website or application. The hardening sequence below should be executed within the first five minutes after Droplet creation, before any application code or database content is placed on the server, because security postures are easier to establish on a clean system than to retrofit onto a running one.
First, create a non-root user account with sudo privileges and disable direct root SSH login. Connecting to servers as root is dangerous because any command executed accidentally with elevated privileges can destroy the system, and because root is the account name that every automated attack script targets. The sequence: SSH into the Droplet as root, run "adduser yourusername" to create the new user, run "usermod -aG sudo yourusername" to grant administrative privileges, then edit the SSH daemon configuration at /etc/ssh/sshd_config to set "PermitRootLogin no" and "PasswordAuthentication no" (if you are using SSH keys), then run "systemctl reload sshd" to apply the changes. After confirming you can SSH in as the new user with sudo access, the root SSH login is disabled and the most common attack vector is closed.
Second, configure the firewall. DigitalOcean Droplets include a cloud firewall that operates at the network edge, outside the Droplet's operating system, and this is the preferred firewall mechanism because it blocks unwanted traffic before it reaches your server, consuming no Droplet resources. Create a cloud firewall through the DigitalOcean control panel, associate it with your Droplet, and configure inbound rules to allow only the ports you need: SSH (port 22), HTTP (port 80), and HTTPS (port 443) for a web server, plus any application-specific ports your services require. Do not leave the default "allow all" configuration — every open port is an attack surface, and a freshly created Droplet will have services listening on ports you are not aware of. For an additional layer of defense, configure the operating system's firewall (UFW on Ubuntu, firewalld on CentOS/Rocky) with identical rules, providing defense in depth if the cloud firewall configuration is accidentally modified.
Third, enable automatic security updates. Ubuntu's unattended-upgrades package, when configured, automatically applies security patches to the operating system and installed packages on a daily schedule, closing newly discovered vulnerabilities without requiring manual intervention. Install it with "apt install unattended-upgrades" and enable it with "dpkg-reconfigure unattended-upgrades" — select "Yes" when prompted. This single configuration choice prevents the scenario where a critical OpenSSL or kernel vulnerability is disclosed, a patch is released within hours, and your Droplet remains vulnerable for weeks because no one remembered to run "apt update && apt upgrade." The small risk of an automatic update causing a service disruption (exceedingly rare with security-only updates) is dramatically outweighed by the near-certainty that unpatched internet-facing servers will be compromised eventually.
Building a Web Server Stack on Your Droplet
LEMP vs. LAMP and the Web Server Decision
The web server stack you install on your Droplet — the combination of operating system, web server, database, and PHP or runtime environment — is the technical foundation that every subsequent decision rests upon, and the initial choice between web server technologies has performance and configuration implications that persist for the life of the Droplet. The two dominant open-source stacks are LAMP (Linux, Apache, MySQL, PHP) and LEMP (Linux, Nginx, MySQL, PHP — the "E" comes from Nginx's pronunciation as "engine-x"). The performance difference between them on modern hardware is narrower than it was a decade ago, but the configuration philosophy is fundamentally different, and that philosophy difference matters more for a first-time VPS user than raw benchmark numbers.
Apache with the event MPM (Multi-Processing Module) and PHP-FPM is the more traditional choice, with a configuration system (.htaccess files) that WordPress and many PHP applications expect and that decades of tutorials and documentation reference. Apache processes each request in a thread pool, and with the event MPM enabled, it handles concurrent connections efficiently for most workloads. Nginx is the newer architecture, designed from the ground up for high concurrency under limited memory through an event-driven, asynchronous processing model that uses significantly less RAM per concurrent connection than Apache's thread-per-connection model. Nginx cannot process PHP natively and relies on PHP-FPM via FastCGI — the same mechanism Apache uses in its modern configuration — but Nginx's configuration syntax is different from Apache's, and .htaccess files do not work, meaning all configuration must be centralized in server block files rather than per-directory overrides. For a first-time VPS user, the learning curve of Nginx's configuration syntax is not substantially steeper than Apache's, and the resource efficiency gains — a Nginx server handling one thousand concurrent connections uses roughly 2.5 MB of RAM versus 25 MB for Apache under similar load with the prefork MPM — justify the investment, especially on the 1 GB and 2 GB Droplets where every megabyte of RAM conserved goes toward MySQL buffer pool and PHP-FPM children.
The software installation sequence on Ubuntu 24.04 for a LEMP stack follows a well-documented pattern: update the package index ("apt update"), install Nginx ("apt install nginx"), install MySQL or MariaDB ("apt install mysql-server" or "apt install mariadb-server"), run the database secure installation script ("mysql_secure_installation" or "mariadb-secure-installation") to set the root password and remove insecure defaults, install PHP with the required extensions ("apt install php-fpm php-mysql php-curl php-gd php-mbstring php-xml php-zip"), and configure Nginx to pass PHP requests to PHP-FPM through a server block configuration file that specifies your domain, document root, and the FastCGI pass directive. DigitalOcean's documentation — widely regarded as among the best in the hosting industry — provides step-by-step tutorials for this exact setup sequence on each supported operating system, and following those tutorials eliminates the guesswork from package names, configuration file paths, and restart commands. The entire process, from a freshly hardened Ubuntu Droplet to a working web server serving a PHP info page, takes approximately twenty to thirty minutes for a first-time user following documentation, and the skills acquired during that process — editing configuration files, managing services with systemctl, understanding the relationship between web server, PHP processor, and database — are skills that transfer to every subsequent server administration task. For those evaluating whether self-managed VPS is appropriate for their skill level, our managed vs unmanaged VPS guide provides a decision framework based on your comfort with command-line operations and the amount of time you are willing to dedicate to server administration.
Database Configuration for Typical Web Workloads
MySQL or MariaDB, installed with default configuration, is tuned for compatibility with minimal hardware — it assumes approximately 512 MB of RAM available for the database server, regardless of whether your Droplet has 1 GB or 16 GB. Configuring the database server to use the RAM actually available to it is the single highest-leverage performance optimization you can perform on a VPS, because database queries are the slowest component in a dynamic web request, and the difference between a query satisfied from RAM (microseconds) and a query that requires a disk read (milliseconds) is the difference between a site that feels fast and one that feels sluggish. The key MySQL configuration variables to adjust are: innodb_buffer_pool_size (set to approximately sixty to seventy percent of available RAM after accounting for operating system, web server, and PHP-FPM memory usage — on a 2 GB Droplet, set this to 512 MB to 768 MB); innodb_log_file_size (256 MB to 512 MB on modern installations); query_cache_type and query_cache_size (disable on MySQL 8.0 where the query cache has been deprecated, or set a modest allocation — 64 MB to 128 MB — on older versions); and max_connections (a higher value allows more concurrent database connections but consumes more RAM per connection — set between 50 and 150 depending on your expected concurrent visitor count).
After adjusting these variables in the MySQL configuration file (/etc/mysql/mysql.conf.d/mysqld.cnf on Ubuntu), restart the MySQL service and run a monitoring tool like MySQLTuner (install via "apt install mysqltuner", run via "mysqltuner") after the server has been serving live traffic for twenty-four to forty-eight hours. MySQLTuner analyzes the server's performance metrics and provides specific, contextualized recommendations for configuration adjustments based on actual workload patterns rather than theoretical best practices — it tells you which variables to increase, which to decrease, and which are already optimally configured for your specific traffic and query patterns. This feedback loop between configuration and observed performance is the mechanism by which a general-purpose database installation becomes a finely tuned database server over the course of a week, and it is a capability that shared hosting environments do not provide because the database configuration is managed by the provider and applied uniformly across all accounts.
Domain, SSL, and Making Your Droplet Accessible to the World
Pointing a Domain to Your DigitalOcean Droplet
Your Droplet has a public IP address assigned at creation, accessible through the DigitalOcean control panel, and pointing a domain to your Droplet is a matter of creating DNS records that map your domain name to that IP address. You can manage DNS through DigitalOcean's built-in DNS service (free, integrates with the Droplet management interface), through your domain registrar, or through a third-party DNS provider like Cloudflare. DigitalOcean's DNS service is the path of least resistance for beginners: navigate to the Networking > Domains section in the control panel, add your domain, and create an A record with the name "@" (representing the root domain) pointing to your Droplet's IP address, and a CNAME record with the name "www" pointing to "@" (so both yourdomain.com and www.yourdomain.com resolve). Then return to your domain registrar's DNS management interface and change the nameservers to DigitalOcean's nameservers: ns1.digitalocean.com, ns2.digitalocean.com, and ns3.digitalocean.com. After DNS propagation (typically one to two hours for DigitalOcean's nameserver changes), your domain resolves to your Droplet's IP address.
If you prefer to route your traffic through Cloudflare for its CDN, DDoS protection, and performance features — which Hosting Captain recommends for most production websites, especially those serving global audiences — the configuration is slightly different and more powerful. Add your domain to Cloudflare, change your domain's nameservers to Cloudflare's (provided during the Cloudflare setup process), and within Cloudflare's DNS management, create an A record for "@" pointing to your Droplet's IP address with the proxy (orange cloud) enabled. The orange cloud means that Cloudflare's edge servers terminate incoming HTTP/HTTPS connections, apply security and caching policies, and forward requests to your Droplet, shielding your origin server from direct exposure to the internet and absorbing DDoS attacks at Cloudflare's network edge. This architecture means that your Droplet only needs to accept connections from Cloudflare's IP ranges, not from the entire internet, and you can restrict your cloud firewall inbound rules to Cloudflare's published IP ranges for HTTP and HTTPS while leaving SSH restricted to your specific IP address — a security posture that is substantially stronger than exposing a web server directly to the public internet.
SSL Certificate Installation via Certbot and Let's Encrypt
HTTPS is not optional in 2026 — browsers flag HTTP sites as "Not Secure," search engines penalize them, and visitors who see the warning abandon the page. Installing a free SSL certificate from Let's Encrypt on your Droplet is a straightforward command-line operation using Certbot, the Electronic Frontier Foundation's automated certificate management tool. The installation sequence on Ubuntu: "apt install certbot python3-certbot-nginx" (for Nginx; use python3-certbot-apache for Apache), then "certbot --nginx -d yourdomain.com -d www.yourdomain.com" to obtain and install the certificate. Certbot modifies your Nginx configuration to enable HTTPS, sets up automatic HTTP-to-HTTPS redirection, and schedules a cron job or systemd timer that checks certificate expiration daily and renews certificates automatically when they are within thirty days of expiry. The entire process takes under two minutes, and the resulting configuration is identical in security strength to a paid SSL certificate from a commercial certificate authority — both provide the same 256-bit encryption and browser trust recognition for basic domain validation.
After SSL installation, verify your configuration using the SSL Labs Server Test (ssllabs.com/ssltest/), which analyzes your server's SSL/TLS configuration and assigns a grade from A+ to F based on protocol support, cipher suite strength, key exchange security, and vulnerability to known attacks. A freshly configured Certbot installation typically achieves an A rating; achieving A+ requires additional configuration — enabling HTTP Strict Transport Security (HSTS) headers, which instruct browsers to always connect to your domain over HTTPS and never attempt an unencrypted connection — that can be added through your Nginx configuration file. The HSTS header is added as a single line in the server block: "add_header Strict-Transport-Security 'max-age=63072000; includeSubDomains; preload' always;" — this tells browsers to enforce HTTPS for your domain for the next two years and optionally submit your domain to the HSTS preload list maintained by Google, which hardcodes HTTPS enforcement into browser source code for maximum protection against SSL stripping attacks.
Ongoing Droplet Management: Backups, Monitoring, and Updates
DigitalOcean Backups, Snapshots, and Your Data Safety Strategy
DigitalOcean offers two backup mechanisms that serve different purposes and should both be part of your data safety strategy. Automated backups are enabled at Droplet creation (or can be enabled later at an additional cost of twenty percent of the Droplet's monthly price) and generate weekly full backups with daily incremental backups, retained for four weeks. Backups are stored on separate infrastructure from the physical host running your Droplet, ensuring they survive hardware failures that affect the primary host. The restoration process creates a new Droplet from the backup image, leaving the original Droplet intact — meaning you can verify the restoration worked before destroying the failed instance. Automated backups are the safety net for catastrophic failures: a misconfigured software update that renders the system unbootable, a filesystem corruption event, or a security compromise that requires rebuilding the server from a known-clean state.
Snapshots are manual, on-demand images of your Droplet's entire disk that you create through the control panel or API, typically before performing a major operation — upgrading the operating system version, migrating to a larger Droplet size, or deploying a significant application update — that carries risk of failure. Snapshots are priced at $0.05 per GB per month, making them inexpensive for infrequent use. The operational discipline that protects your data is: before any operation where the instructions involve the phrase "make sure you have a backup," take a snapshot. The snapshot creates a restore point you can return to if the operation fails, and the cost of storing that snapshot for a few days while you confirm the operation was successful is measured in cents. For application-level backups — your WordPress database, uploaded media, and configuration files — implement a separate backup strategy that exports this data to off-server storage (DigitalOcean Spaces, AWS S3, or a cloud storage service) on a daily schedule, because automated Droplet backups capture the entire disk image and restoring an entire Droplet to recover a single accidentally deleted blog post is like replacing a car's engine to change a spark plug. The UpdraftPlus WordPress plugin configured to back up to cloud storage, or a simple cron job that runs mysqldump and rsync to an off-server destination, provides granular, application-level recovery that complements the system-level protection of Droplet backups.
Monitoring, Resource Alerts, and When to Resize Your Droplet
DigitalOcean's built-in monitoring provides graphs of CPU utilization, memory usage, disk I/O, and network throughput at various time resolutions, accessible from the Droplet's control panel page. This monitoring is sufficient for basic health checks — confirming that your Droplet has not exhausted RAM and begun swapping, verifying that CPU utilization is not pegged at one hundred percent under normal load — but it is external monitoring that measures resource consumption from the hypervisor level, not from within the operating system. For deeper visibility, install a monitoring agent like Netdata (open-source, single-line installation, provides per-second granularity on every system metric with no configuration) or configure Prometheus with Grafana (more powerful but more complex to set up) to understand exactly which processes are consuming which resources and how those consumption patterns change over time. This internal monitoring is what transforms "my site is slow" from an inscrutable complaint into an actionable diagnosis: "MySQL is consuming eighty-five percent of available RAM, queries are spilling to disk, and the buffer pool needs to be reduced or the Droplet upgraded to the next RAM tier."
DigitalOcean supports live resizing of Droplets to larger plans: powering off the Droplet, selecting a larger size from the Resize menu, and powering it back on, with only the storage allocation increasing automatically while RAM and vCPU increase immediately. Resizing to a smaller Droplet is more constrained — you can decrease RAM and vCPU but cannot decrease the disk size, which means resizing downward generally only works if your disk usage is below the smaller plan's allocation. The operational signals that indicate it is time to resize are: sustained RAM usage above eighty percent of allocation, causing swap usage to increase; sustained CPU steal time above five percent on Basic Droplets (indicating the physical host is overcommitted and you would benefit from the dedicated vCPUs of a Premium or higher-tier Droplet); and disk usage approaching eighty percent of allocation, which impacts database performance and log rotation. Resizing is a five-minute operation on DigitalOcean, and the ease of this path — combined with the ability to test performance on the larger plan for a month and then downgrade if it was unnecessary — eliminates the overthinking that leads users to provision Droplets larger than they need "just in case." Start with the smallest Droplet that can run your stack, monitor actual usage, and resize when the data shows you need more. For additional perspective on VPS resource allocation and sizing considerations beyond what is specific to DigitalOcean, our $1 VPS plans analysis examines the broader economics of budget VPS offerings and how they compare to the guaranteed resource model that DigitalOcean and similar providers offer.
Frequently Asked Questions
Do I need to know Linux to use a DigitalOcean Droplet?
Yes, a working knowledge of Linux command-line operations — navigating directories, editing files with a text editor like nano or vim, managing services with systemctl, and understanding file permissions — is required to set up and maintain a DigitalOcean Droplet. Shared hosting abstracts these operations behind a graphical control panel; Droplets expose them directly as the server's native interface. The learning curve is real but finite: the specific commands needed for web hosting (installing packages with apt, editing Nginx configuration files, restarting services) can be learned from DigitalOcean's documentation in a single focused weekend, and those skills transfer to every Linux server you will ever manage.
How much does a Droplet cost compared to shared hosting?
The entry-level Basic Droplet costs $4 per month (regular) or $6 per month (Premium with NVMe and dedicated vCPU), which is comparable to or lower than mid-tier shared hosting plans. However, the total cost comparison must include the value of your time spent on server administration — an unmanaged Droplet requires ongoing attention to updates, security, and performance that shared hosting handles for you. If your time is abundant and budget-constrained, the Droplet is cheaper; if your time is scarce and you would rather spend it on building your website than administering a server, a managed VPS or shared hosting may represent better value despite the higher dollar cost. For growing businesses, our dedicated server guide explains the next tier beyond VPS and the thresholds at which each upgrade becomes economically justified.
Can I host multiple websites on one Droplet?
Yes, a single Droplet can host multiple websites by configuring separate Nginx server blocks (or Apache virtual hosts) for each domain, each pointing to a different document root directory. The number of websites a Droplet can support is limited by available RAM and CPU, not by any software restriction. For planning purposes, allocate approximately 512 MB of RAM per modest-traffic WordPress site, with the understanding that all sites share the same PHP-FPM pool, MySQL instance, and operating system memory, and a traffic spike on one site will affect performance for all sites on the Droplet. For production environments hosting multiple client sites, consider containerizing each site using Docker or separating them into isolated PHP-FPM pools to limit the blast radius of any single site's resource consumption.
What happens when my Droplet runs out of resources?
When a Droplet exhausts its allocated RAM, the Linux kernel begins swapping memory pages to disk — a process that degrades performance from sub-second to multi-second response times but does not crash the server. If swap space is also exhausted, the kernel's Out-Of-Memory (OOM) killer terminates processes to free memory, potentially killing MySQL, Nginx, or PHP-FPM — any of which will take the website offline until the services are manually or automatically restarted. When a Droplet exhausts its CPU allocation (hitting one hundred percent utilization on all vCPUs), processes queue for CPU time, response times increase linearly with the queue depth, and the server remains online but becomes unusably slow. Monitoring and alerting on RAM and CPU usage, with alerts triggered at eighty percent sustained utilization, allows you to resize the Droplet before resource exhaustion affects visitors.
Emma Larsson is a lead systems developer and virtualization specialist with a decade of expertise in kernel configurations and hypervisor scaling.
Frequently Asked Questions
This guide covers the practical decision points — pricing, performance, and when it makes sense for your situation — based on current 2026 data.
Pricing varies by provider and plan tier; see the cost breakdown section above for current ranges and what's actually included at each price point.
Look closely at uptime guarantees, renewal pricing (not just the first-year discount), and how responsive support actually is — all covered in detail in this article.
Hosting Captain has been exceptional for my e-commerce store in Pune. The NVMe SSD speed is
noticeable, and their support team responds within minutes. Highly recommended for any
Indian business!
Ryan John, Pune
Great Value for Money
Switched from a US-based host to Hosting Captain and my website loads 3x faster for Indian
visitors. The free SSL and cPanel are great, and the pricing is unbeatable. Very satisfied
customer!
Priya Mehta, Mumbai
Reliable VPS Hosting
I've been using their VPS plan for 2 years now. 99.9% uptime is not just a claim — it's
reality. My client projects run without interruption. The KVM virtualization gives me full
control I need.
Amit Kumar, Bangalore
Excellent 24/7 Support
The support team helped me migrate my entire WordPress site at 2 AM without any downtime.
This level of service is rare in Indian hosting. Worth every rupee!
Sunita Patel, Ahmedabad
Perfect for Startups
As a startup, budget matters. Hosting Captain's Business plan covers everything we need —
multiple websites, free SSL, daily backups — at a fraction of what international hosts
charge.
Vikram Singh, Delhi
Professional Dedicated Server
Our high-traffic news portal needed a dedicated server. Hosting Captain's DS Business plan
handles 100K+ daily visitors effortlessly. Their team provisioned everything within 4 hours!
Meena Krishnaswamy, Chennai
Trusted Technologies & Partners
Start Your Website with Hosting Captain
From personal blogs to enterprise solutions, we've got you covered!